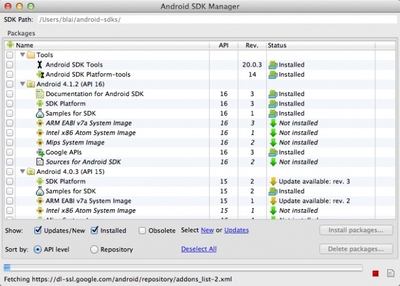
android sdk 更新到 r23 时,eclipse 自带 adt版,里面并没有设置ndk的路径,从而导致了在ndk配置方面的难度。本文主要适合:
① 使用 android sdk r23 20140702的朋友
② 使用 android ndk r10d 的朋友
③ 想知道andorid adt自带eclipse无法设置ndk路径的解决方法
④ 不知道如何使用代理ip的朋友
⑤ 不知道如何下载 android sdk, android ndk的朋友
本文同时涉及:
①windwos上的androidndk环境搭建(附视频,同时包括xp,vasta,win7,win8,win8.1,win10等主流的windows版本);
②linux下的androidndk环境搭建(附视频,同时包括mac系统,ubuntu系统,debian,红帽,麒麟等unix和linux的主流操作系统);
③百度云中同时存有一份android 4.4的系统源码,压缩包有3.82个G的大小;
方便他人亦是方便自己,如果觉得还行就点下右边的投票吧,这样可以帮助其他人更快的找到解决问题的方法;有疑问的也可留言哦, 谢谢!
软件百度云链接:http://pan.baidu.com/s/1nt9g7zz 密码:50m4
android ndk环境配置――工具/原料win8 x64android-ndk-r10d-windows-x86_64.execom.android.ide.eclipse.ndk_23.0.2.1259578.jarubuntukylin-14.04-desktop-amd64android-ndk-r10c-linux-x86_64.binandroid ndk环境配置――前期准备
android ndk环境配置 1、
?
环境搭建的问题,建议大家最好看视频,虽然理论上android环境搭建很简单,但是存在了太多的陷阱,由于陷阱太多,细节太多帖子难免有些会漏掉一些类容,所以建议看视频,视频讲解的更全面一下谢谢!
android ndk环境配置 2、
android sdk环境搭建:
http://jingyan.baidu.com/article/d621e8da0999062865913f3b.html
android ndk环境配置 3、
下载androidndk,具体可以参考:
http://jingyan.baidu.com/article/636f38bb267982d6b84610f0.html
android ndk环境配置 4、
下eclipse支持ndk插件,具体看:
http://jingyan.baidu.com/article/4d58d5413000a09dd4e9c0fe.html
android ndk环境配置――Windows下搭建android ndk环境配置 1、
将下载下来的“android-ndk-r10c-windows-x86_64.exe”放到
“D:Android“目录下面,然后双击安装,便会自动解压到"D:Android"
下面android ndk环境配置 2、
将百度云中的“com.android.ide.eclipse.ndk_23.0.2.1259578.jar”下载到"D:Androidadt-bundle-windows-x86_64-20140702eclipsepluginscom.android.ide.eclipse.ndk_23.0.2.1259578.jar"
android ndk环境配置 3、
① 启动"D:Androidadt-bundle-windows-x86_64-20140702eclipseeclipse.exe"
② 选择菜单栏上的[Window->Perferences->Android->NDK]设置 NDK Loaction 为D:Androidandroid-ndk-r10d;
android ndk环境配置 4、
添加环境变量 NDK_ROOT为: D:Androidandroid-ndk-r10d
在环境变量 PATH下追加:%NDK_ROOT%;
android ndk环境配置 5、
如果是在Windows上做开发的话,建议使用VisualGDB插件,方便进行调试,具体的话可以看“VisualGDB 环境搭建”:
http://jingyan.baidu.com/article/a681b0de1a361c3b1843460c.html
android ndk环境配置――linux下搭建android ndk环境配置 1、
将下载下来的“android-ndk-r10c-linux-x86_64.bin”复制到home下的android下面,如“/home/fuke-ubuntu/android”;
android ndk环境配置 2、
在shell中运行:./android-ndk-r10d-linux-x86_64.bin
将 android-ndk-r10d-linux-x86_64.bin解压到当前目录
android ndk环境配置_ndk
android ndk环境配置 3、
将百度云中的“com.android.ide.eclipse.ndk_23.0.2.1259578.jar”下载到"
/home/fuke-ubuntu/android/adt-bundle-linux-x86_64-20140702/eclipse
/plugins/com.android.ide.eclipse.ndk_23.0.2.1259578.jar"
android ndk环境配置 4、
① 启动"/home/fuke-ubuntu/android/adt-bundle-linux-x86_64-20140702/eclipse/eclipse.exe"
② 选择菜单栏上的[Window->Perferences->Android->NDK]设置 NDK Loaction 为"/home/fuke-ubuntu/android/android-ndk-r10d";
android ndk环境配置 5、
①通过在shell中输入:“sudo gedit /etc/profile”打开 profile文件;
②在profile文件中添加环境变量:
NDK_ROOT="/home/fuke-ubuntu/android/android-ndk-r10d"
PATH=$NDK_ROOT:$PATH
android ndk环境配置_ndk
android ndk环境配置――如何编译HelloJniandroid ndk环境配置 1、
在eclipse中导入“D:Androidandroid-ndk-r10bsampleshello-jni”程序, 具体流程如下图所示:
android ndk环境配置_ndk
android ndk环境配置 2、
右键工程 Android Tools 下面的 Add Native Support,具体见:
http://jingyan.baidu.com/article/03b2f78c73b5a85ea237aeb0.html
android ndk环境配置 3、
1、“Ctrl+B”build工程;
2、右键->Run As..->Android Application...
3、观察模拟器效果
android ndk环境配置_ndk
android ndk环境配置――总结android ndk环境配置 1、
如果在配置环境或者开发的过程中遇到了一些诡异的问题时,建议大家看“android ndk 开发建议”
http://jingyan.baidu.com/article/ac6a9a5e7dbe282b653eac9b.html
android ndk环境配置 2、
更多的关于anroid ndk方面的资料可以看:
http://tieba.baidu.com/f?kw=ndk
android ndk环境配置 3、
方便他人亦是方便自己,如果觉得还行就点下下边的投票吧,这样可以帮助其他人更快的找到解决问题的方法;有疑问的也可留言哦, 谢谢!
 爱华网
爱华网